Using Student Groups
Student groups can be used in many ways in my.UChicago, such as designating students for term activation, enrollment appointments, or athletic team membership. A student can be added to a group individually or via batch.
Assigning Individual Students to a New Student Group
In the Student Registration WorkCenter, click on the Student Groups link in the Service Indicators and Groups section.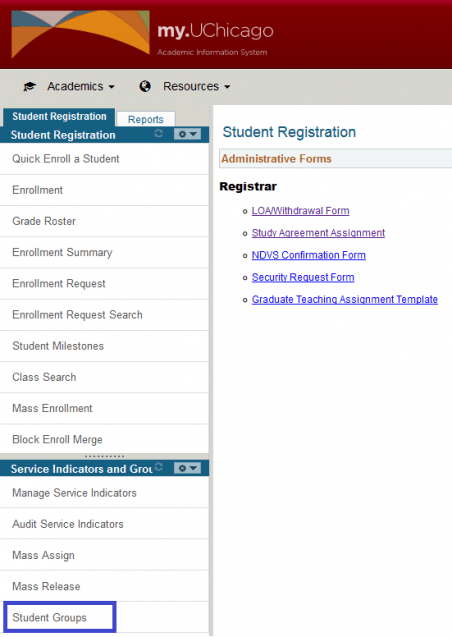 Enter the UCID of the student you wish to give the student group to and click Search.
Add a row by clicking the + sign on the top right.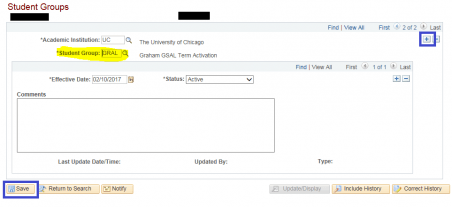 In Academic Institution, enter UC (if not already populated).
Select the student group. Note: If you do not see the group in the list of options, this is due to security. Please contact the Registrar’s Office to have this updated.
Click Save
Inactivate a Student's Membership in a Group
Students can be also inactivated from a student group. This allows you to exclude a student from processes and reports that look for the group while maintaining a history of past membership.
In the Student Registration Work Center, click on the Student Groups link in the Service Indicators and Groups section.
Enter the UCID of the student you wish to give the student group to and click Search.
Find the active group entry you want to update. Add a row by clicking the + sign to the right of the status.
You will see an increase in the total number of rows for the group. Using the drop-down, change the status to Inactive.
Today is the default effective date; update if necessary.
Click Save.
Reactivate an Inactive Student Group for a Student
In the Student Registration Work Center, click on the Student Groups link in the Service Indicators and Groups section.
Enter the UCID of the student you wish to give the student group to and click Search.
Find the group used previously. You should see that the status of the group is Inactive. Add a row by clicking the + sign to the right of the status.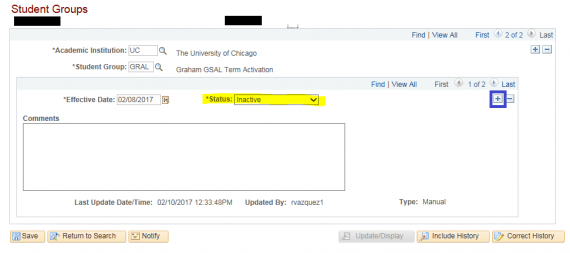 You will see an increase in the total number of rows for the group. Using the drop-down and change the status to Active.
 Click Save.
Manage Student Groups in Batch
Create a batch source file by saving the UCIDs of the students you want to apply the student group to in an Excel document. The file should have no header row and all IDs should be in Column A, beginning with cell A1, as shown below. Once complete, the file should be saved as a CSV (Comma delimited) (*.csv) file.

In the Student Registration Work Center, click on the Process Student Groups link in the Service Indicators and Groups section.
If you have a Run Control ID that you use for running other processes, select it by clicking Search in the Find an Existing Value tab. If you do not have a Run Control ID, click on the Add a New Value tab. Enter the run control ID you’d like to create (it can be your cNet, name, etc.) and click the Add button. You will be able to use this same Run Control ID the next time you run a batch process. NOTE: Do not include any spaces in your Run Control ID, or it will not work.
On the Process Student Groups page, click the Population Selection checkbox on the top left. Using the Selection Tool dropdown, select External File. If this is your first time running a batch process, click the Upload File button, and use the browse option to find, attach, and upload your file. If you’ve run a batch before, the previous file you uploaded will still display. Click the Delete File button to the right of the Upload File button to remove the file before proceeding with Upload File. Click the magnifying glass in the File Mapping field and select EMPLID_ONLY.
To make sure your file mapped properly and the batch will run successfully, you can click the Preview Selection Results link on the right. You should see something similar to the image below with each row listing a UCID.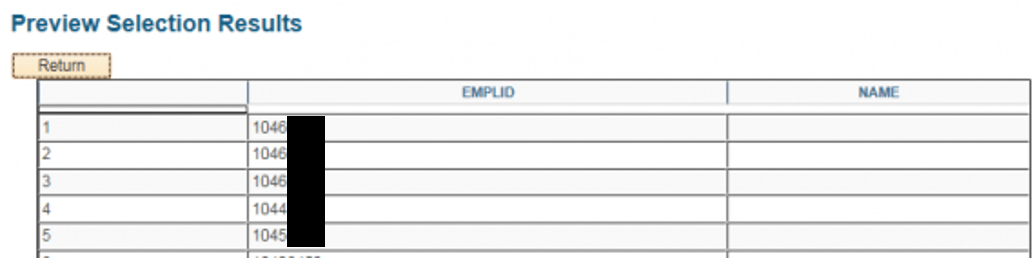
If the file is incorrectly formatted, you will see something similar to the image below with strange characters instead of EMPLIDs.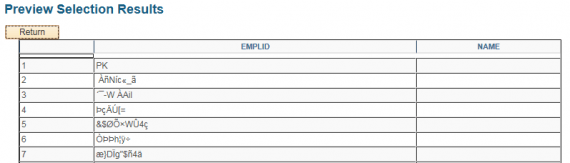
If the preview shows incorrect data, click the Return button at the top left to exit the preview and return to the Process Student Groups page. Remove the erroneous file by clicking the Delete File button and then upload a corrected file before proceeding with the steps below.
In the Student Group Data section, enter the following:
- Academic Institution: UC
- Student Group Code
- Effective Status:
- Active (include student in a group for the first time or indicate they have rejoined a group)
Inactive (indicate the student is no longer in the group but maintain a history of past membership) When you are ready to create the batch file, click the yellow Run button on the top right. In the Process Scheduler Request screen, check the box to the left of SCC_STD_GRP, make sure the *Type is Web and *Format is TXT, and click OK.
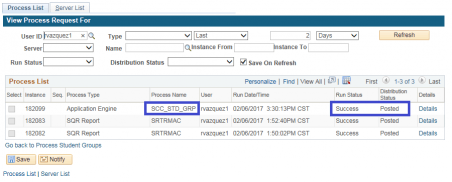
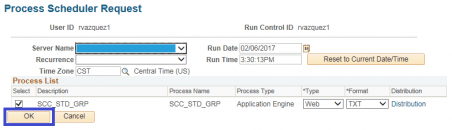 In the Process Student Groups page, click on the Process Monitor link that is left of the Run button. Click the Refresh button on the top right periodically until the Run Status says “Success” and Distribution Status says “Posted,” indicating that the process is done.