Pre-Registration for New Incoming Students (Autumn Quarter)
Incoming first year students register for their first quarter of courses during First Year Pre-Registration process which occurs over the summer. Students select and rank their preferred courses and an algorithm is run in the registration system to maximize their top choices based on several factors, including seat availability, to create the student’s schedule.
Pre-Registration Reference Guides for Continuing Students
Continuing students will submit their pre-registration requests through My Planner.
Accessing Pre-Registration
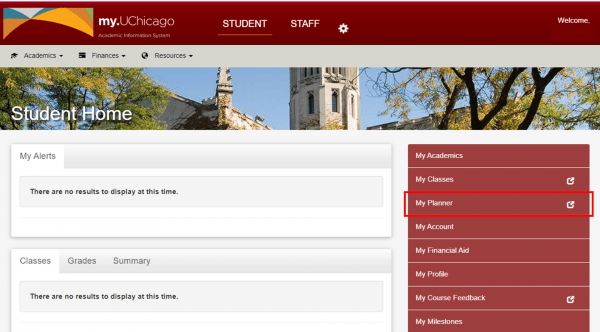
Navigate to my.UChicago and log-in using your CNetID and Password. Click on the “My Planner” button to Pre-Register for classes.
Searching for Courses
Select “Plan your Path” and click the “+Add to Autumn/Winter/Spring” button to add classes to your plan. You can also use the “Search Courses” bar on the upper right hand corner of the screen.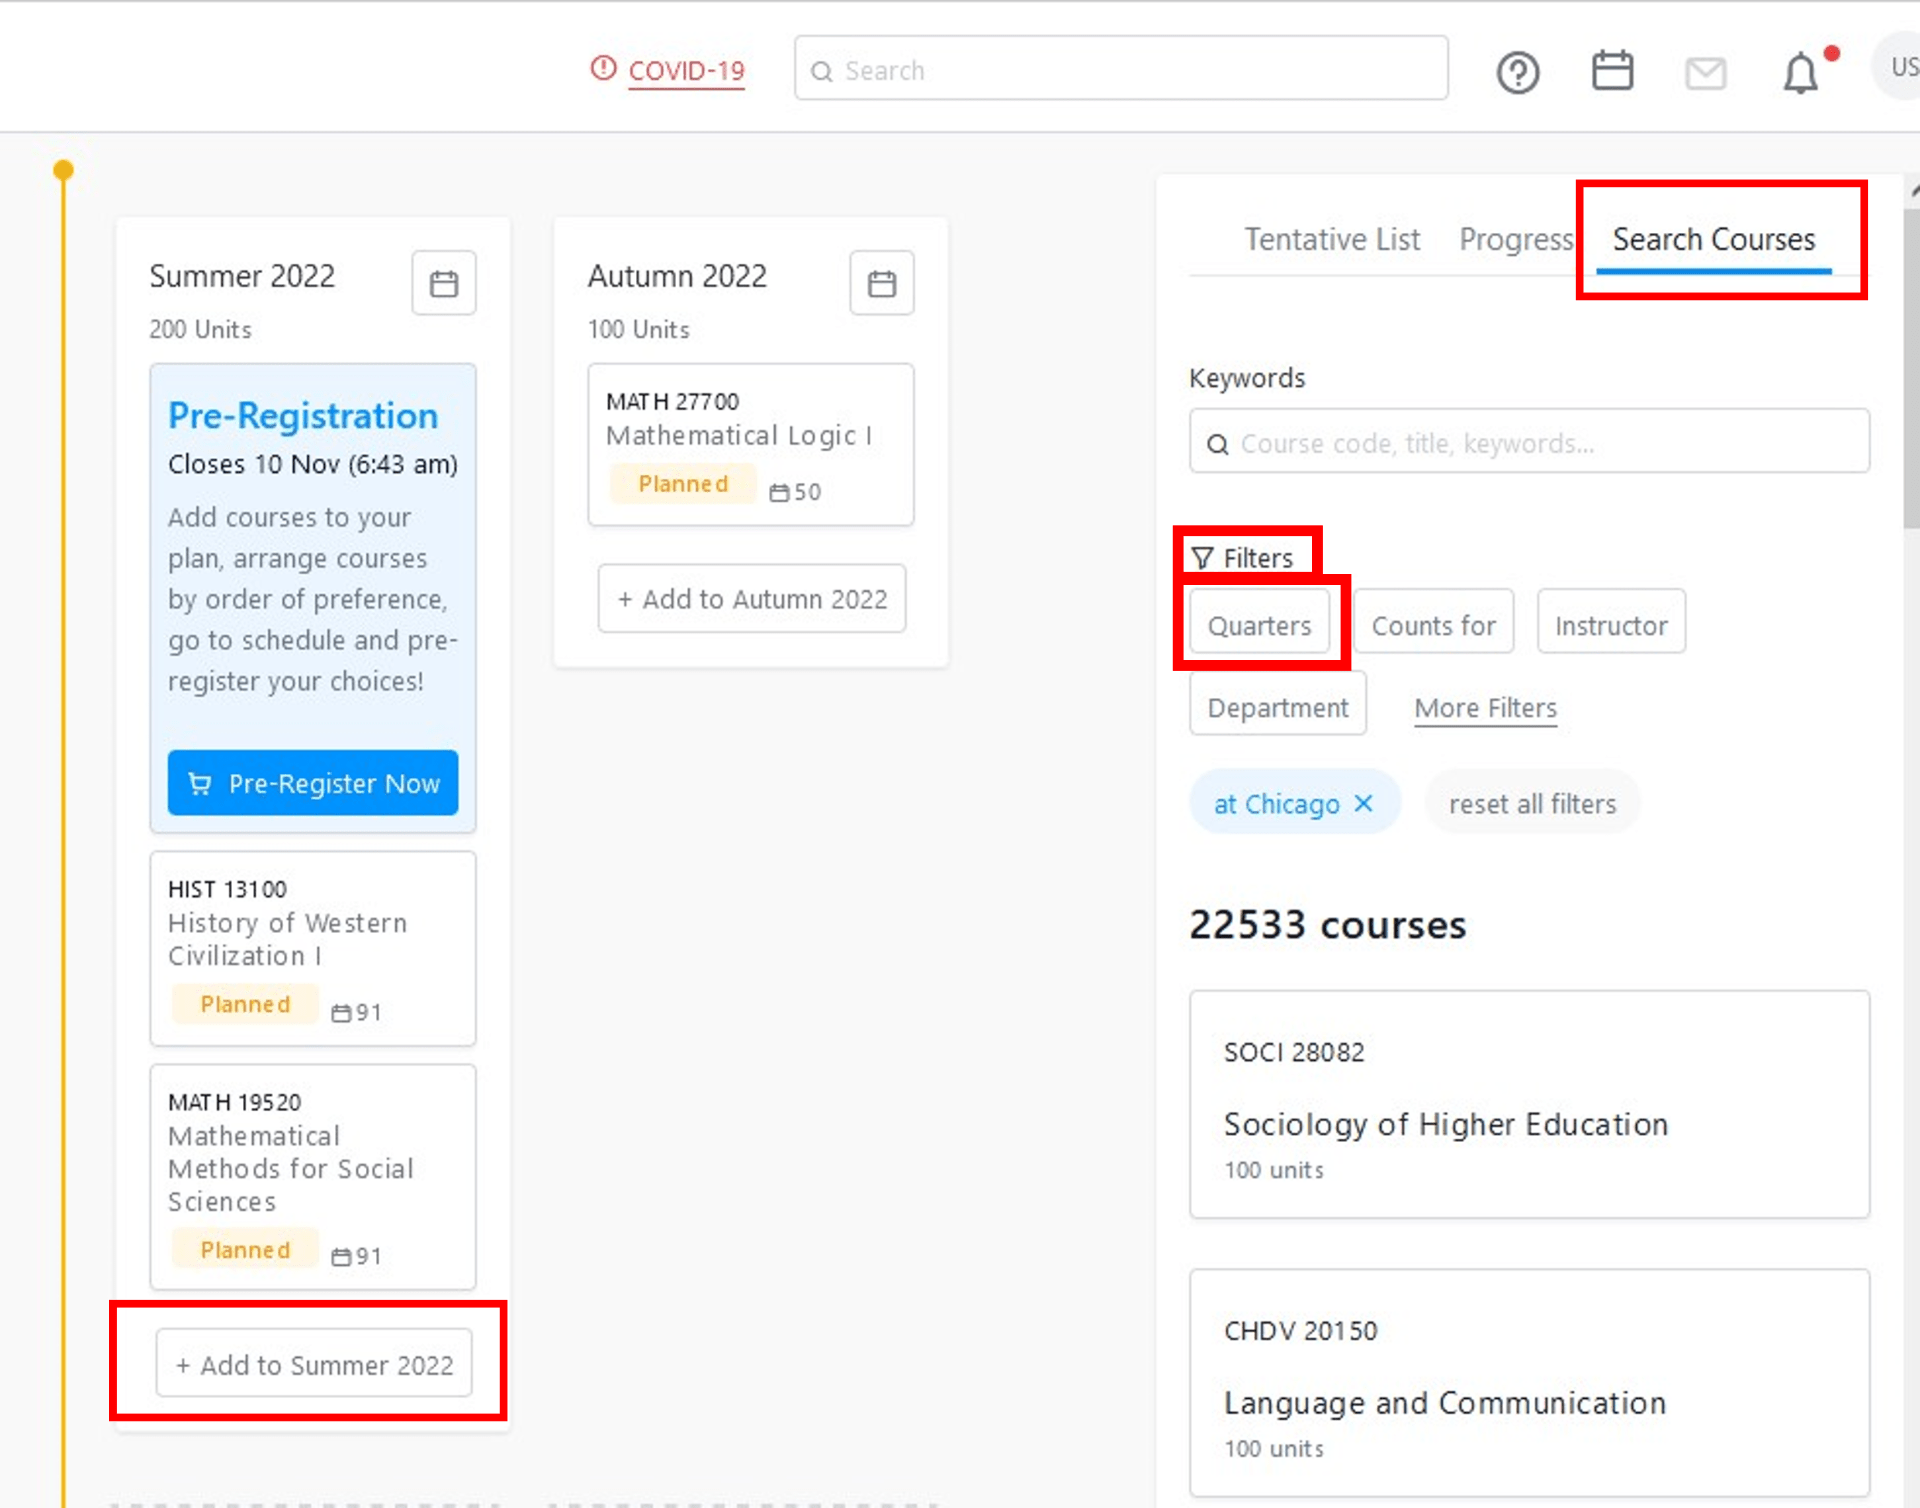
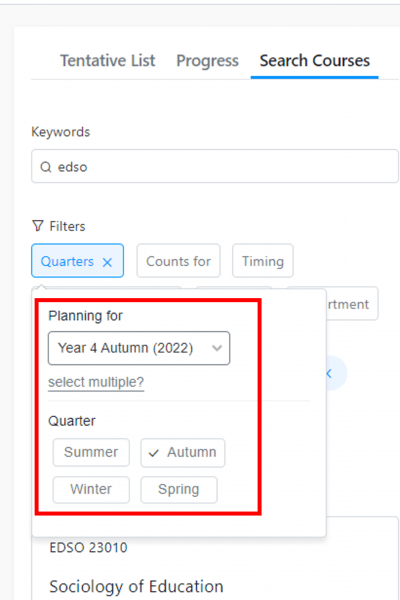
You can search by course name, title, keyword, or requirement to find the courses that you would like to add to your plan. When searching for courses, be sure to use the filter to select the quarter in which you want to pre-register.
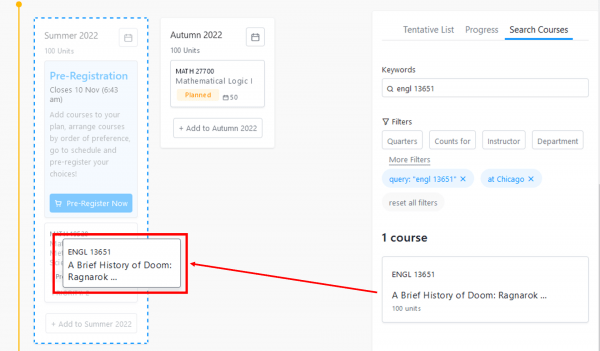
Once you find a course that you would like to add to your list, you can drag the course directly into your planned list.
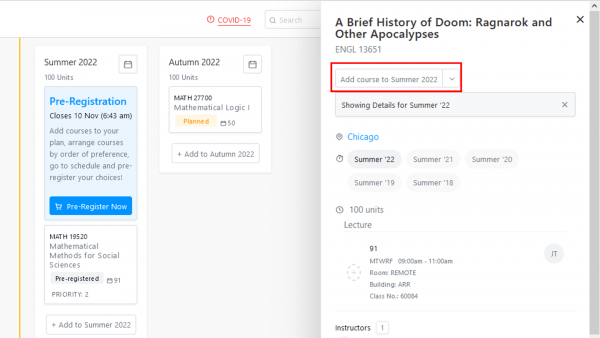
If you would like to obtain more information about the course before adding it to your list of planned courses, you can drill into the course. From this page, you can use the “Add course (to term)” button at the top of the page to add the course into your planned list.
Moving Class Sections into your Pre-Registration Cart
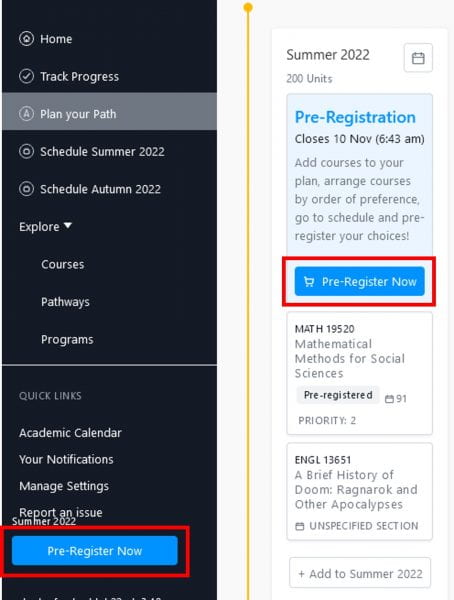
Once you have added courses to your plan, click on one of the blue “Pre-Register Now” buttons.
To move the courses into your Pre-Registration Cart, you can either drag and drop individual courses from your Course Plan or you can click on “Add All to Cart”. NOTE: You may need to select a specific section of your planned course before you can add it to the cart. Use the “select a section” link.
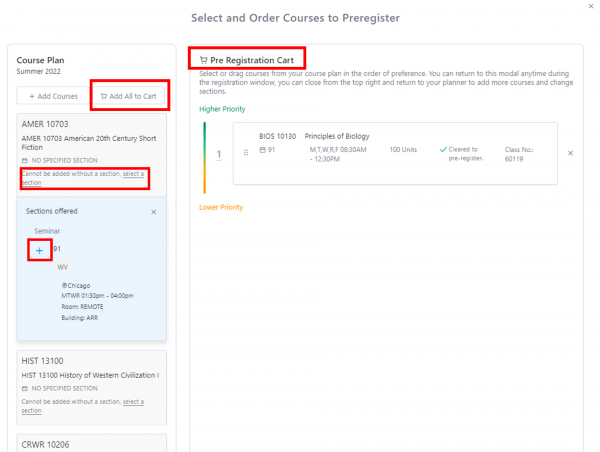
Adding multiple sections of the same course into your Pre-Registration Cart
If you would like to add more than one section of the same course into your Pre-Registration Cart, you will need to first “select a section” of the course.

Once you have added the first section, you will then need to click on “+Add Courses” to add the course to the “Course Plan” and then “Select a Section” for any additional sections you wish to add. You will need to do this for each section that you wish to add to your Pre-Registration Cart.

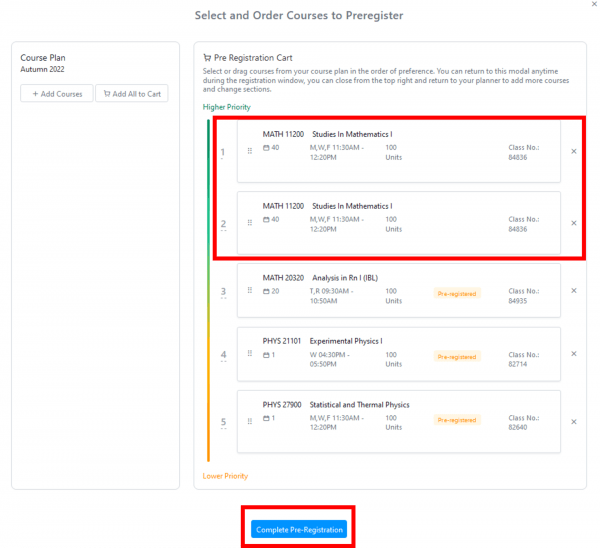
Once you have all of the sections listed in your Course Plan, you can move them to your Pre-Registration Cart and rank them accordingly. Be sure to click on “Complete Pre-Registration” once you are ready to submit.
Ranking Class Sections in Pre-Registration Cart
In the Pre-Registration Cart, you can rank classes in order of preference (1=most desired, 10=least), for up to ten classes.
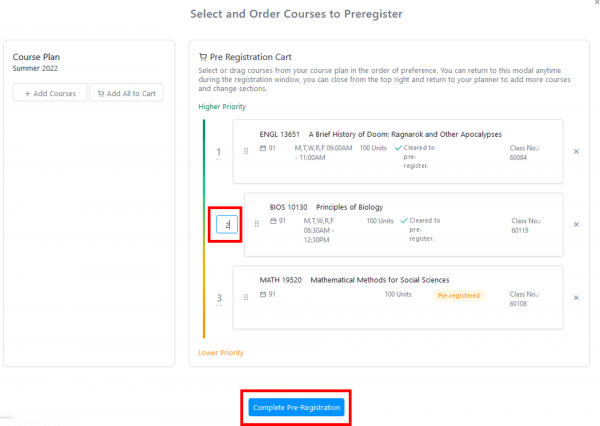
Once the classes are in the Pre-Registration Cart, you can update the your ranking. This can be done either by clicking on the current ranked position and updating it to a specific sequence order or you can drag and drop the sections into the appropriate order. Once you are done, click the “Complete Pre-Registration” button at the bottom of the screen.
NOTE: You can go back into the Pre-Registration Cart and make changes any time during the week of pre-registration; however, you must click the “Complete Pre-Registration” button again after making any updates.
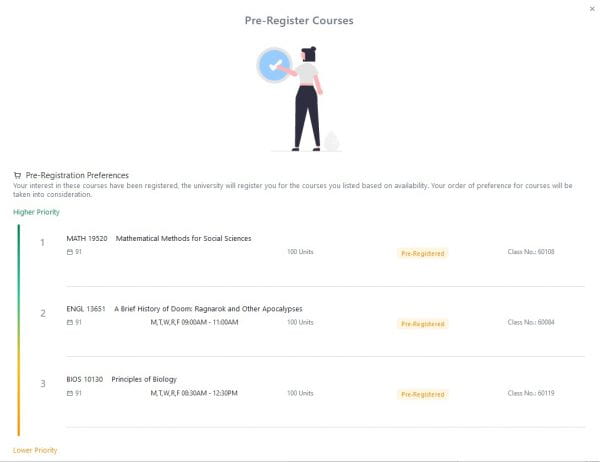
Once you click on “Complete Pre-Registration”, the confirmation screen will display your preferences.
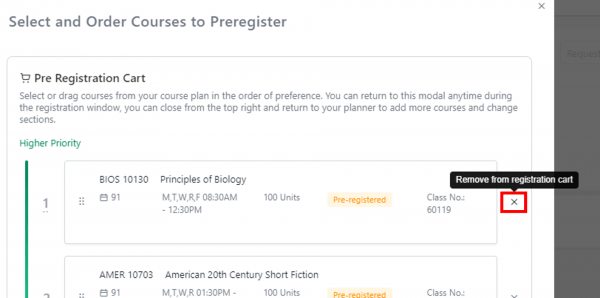
Removing Pre-Registration Preferences
If you would like to remove any class from your Pre-Registration Cart, click the “X” to the right of the class. Once you have removed the selected classes, click the “Complete Pre-Registration” button to save your changes.
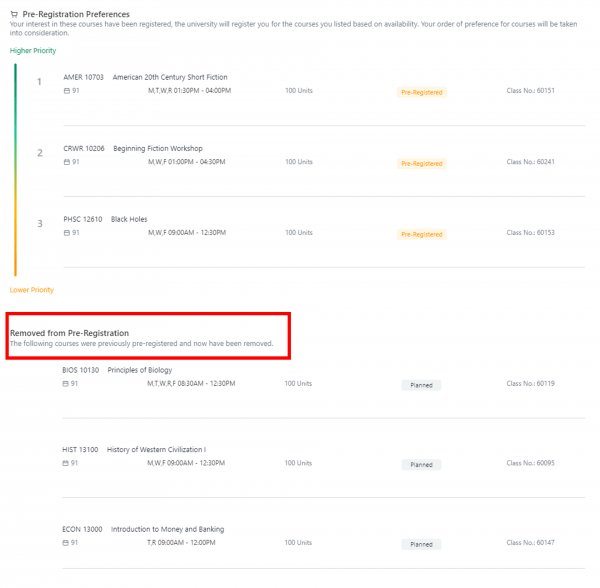
The confirmation screen will show you what courses were removed and display your current pre-registration preferences.
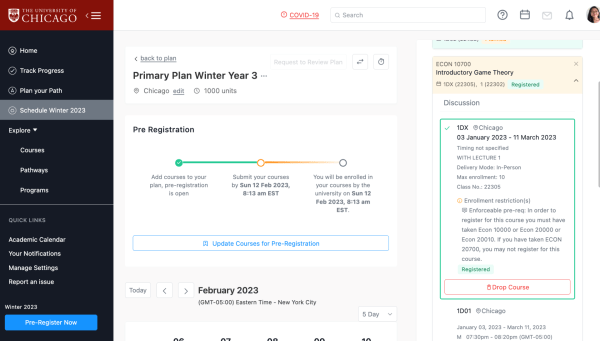
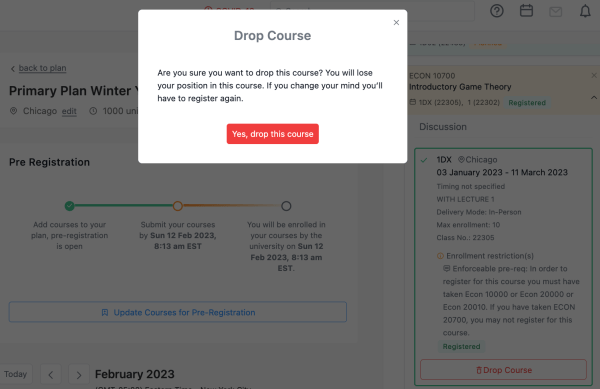
Dropping Auto-Enrolled Classes
You can view your Auto-Enrolled (aka “rollover”) courses in either the Plan Your Path page or the Schedule page in My Planner. Registered courses will be denoted with a green “registered” tag. Auto-Enrolled courses must be dropped through the “Schedule” page in My Planner. On the Schedule Page, select the course that you wish to drop, and click on the “Drop Course” button. This will drop your enrollment from the course entirely, in both My Planner and your Student Portal. Please note that dropping a course forfeits your seat in that course, and you must re-request through pre-registration if you wish to re-enroll after dropping.